Restoration-- Worksheet #1
Before:
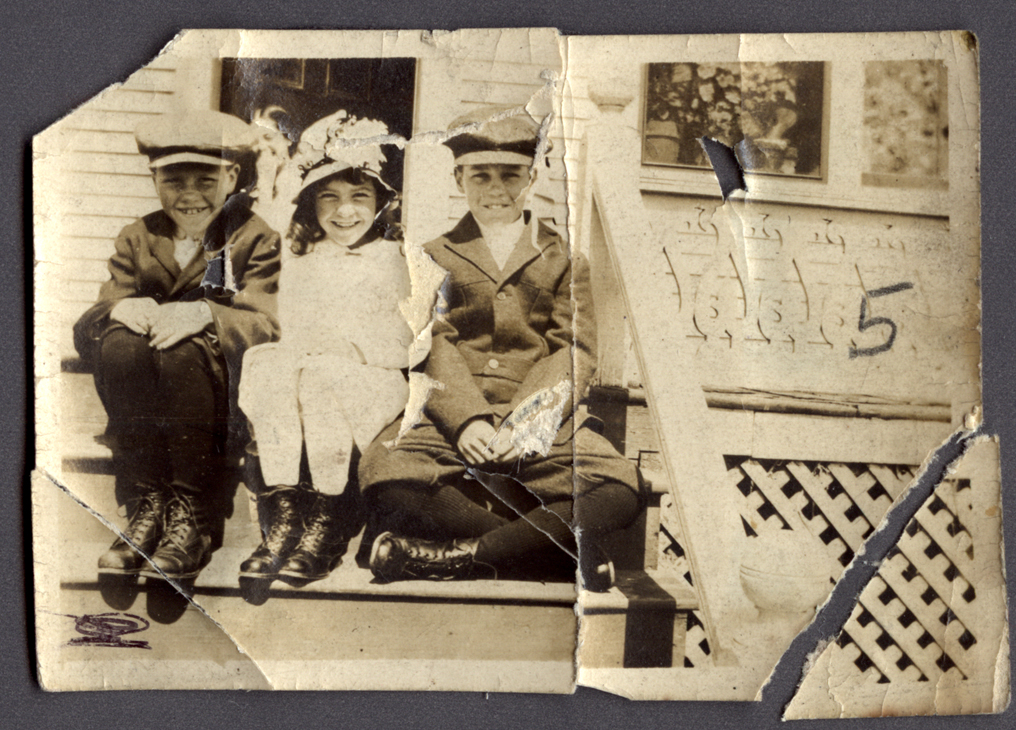
After:
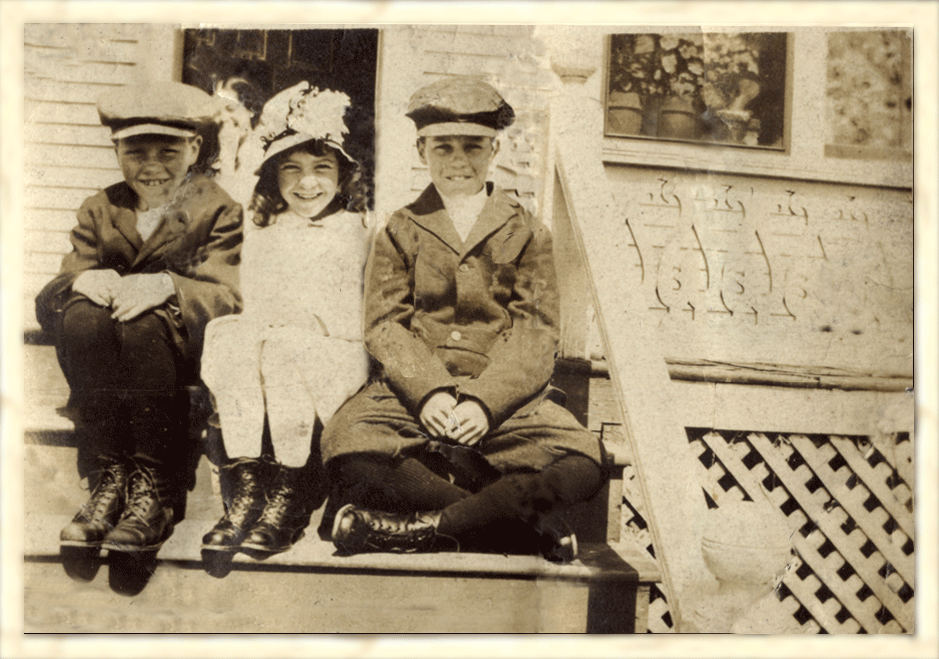
This was the first of several photoshop-based restoration projects completed as a part of Digital Photography. The first of the two images is the original, the second was restored using Adobe Photoshop CS6. I used the program to fix the major cracks and folds in the image, restore the arm of the boy all the way to the right, repair the torn pieces of the image, and recreate the border. For the most part I accomplished this using the clone stamp tool and multiple layers of copy and pasting.
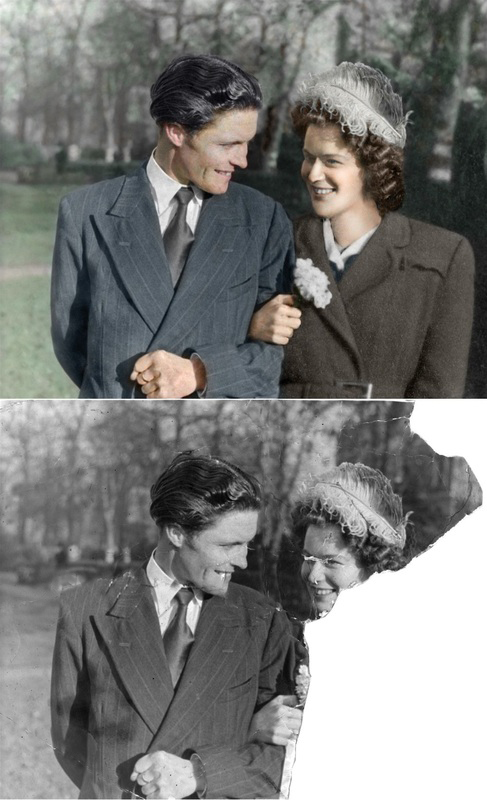
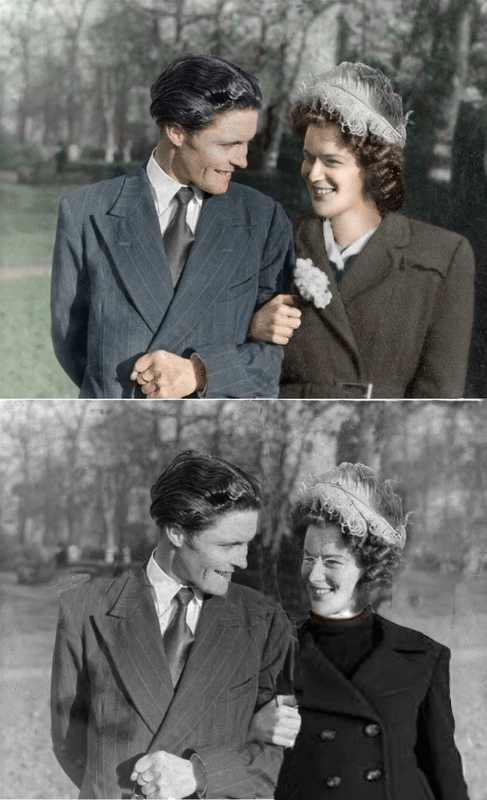
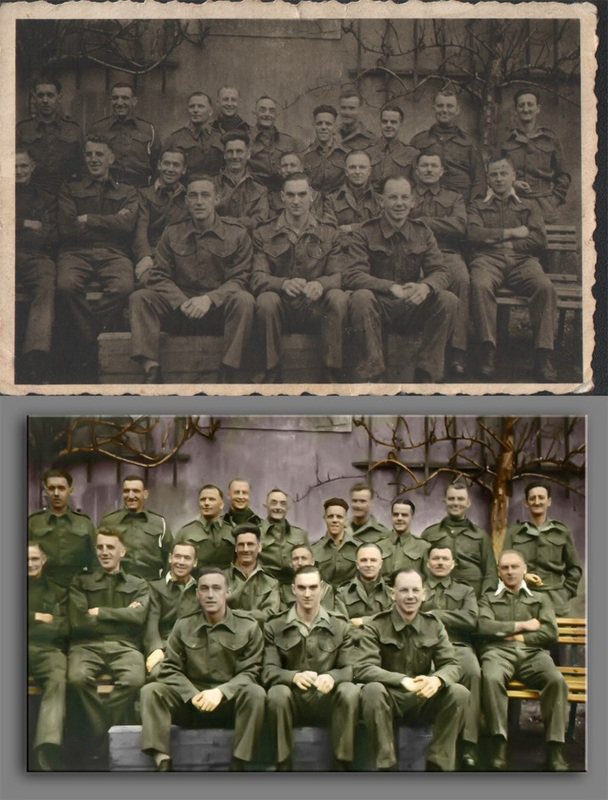
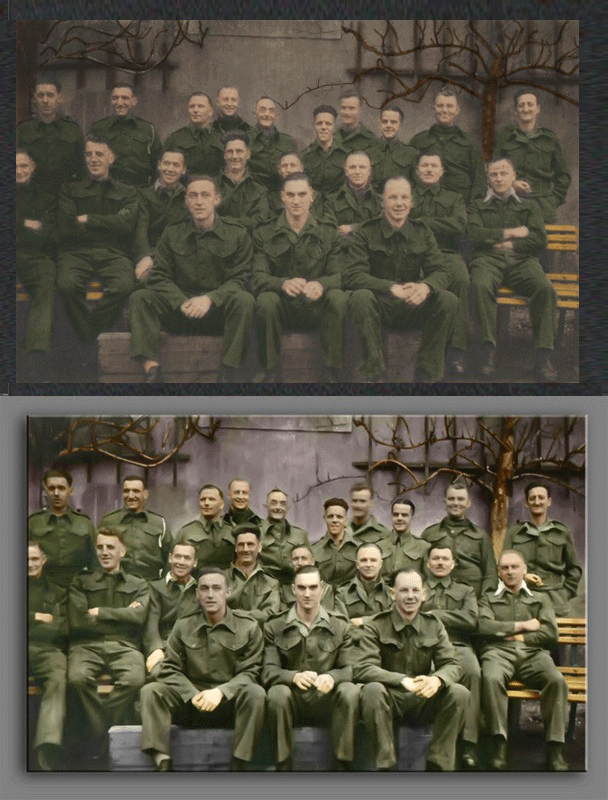
Restoration-- Worksheet #2
|
Before:
|
After:
|
This is the second of the restoration projects that serve as part of the classwork component of Digital Photography. The image on the left is the original, the image on the right was restored using Photoshop and other outside sources. The top image of the two served as a reference photo, the bottom image being the one restored. In the process of this restoration I found an image of a coat to use for the woman in the second photo, used Photoshop to make the image of the coat black and white to match the rest of the photo, and manipulate the coat onto the woman, and used clone stamp to repair the cracks in the image, and the missing pieces.
Restoration-- Worksheet #3
|
Before:
|
After:
|
The main purpose of this restoration was to restore the color in the top image, making it similar to the bottom. I did this using the color selection tool and multiple layers to paint over the varying areas of the picture using the overlay feature in Adobe Photoshop PS 6. In addition to this, I used the clone stamp tool to fix some of the cracks and imperfections in the image, and created a uniform grey border by copying and pasting the usable parts of the border and extending them outwards into a shaped, undamaged frame.
Alteration-- Worksheet #4
|
|
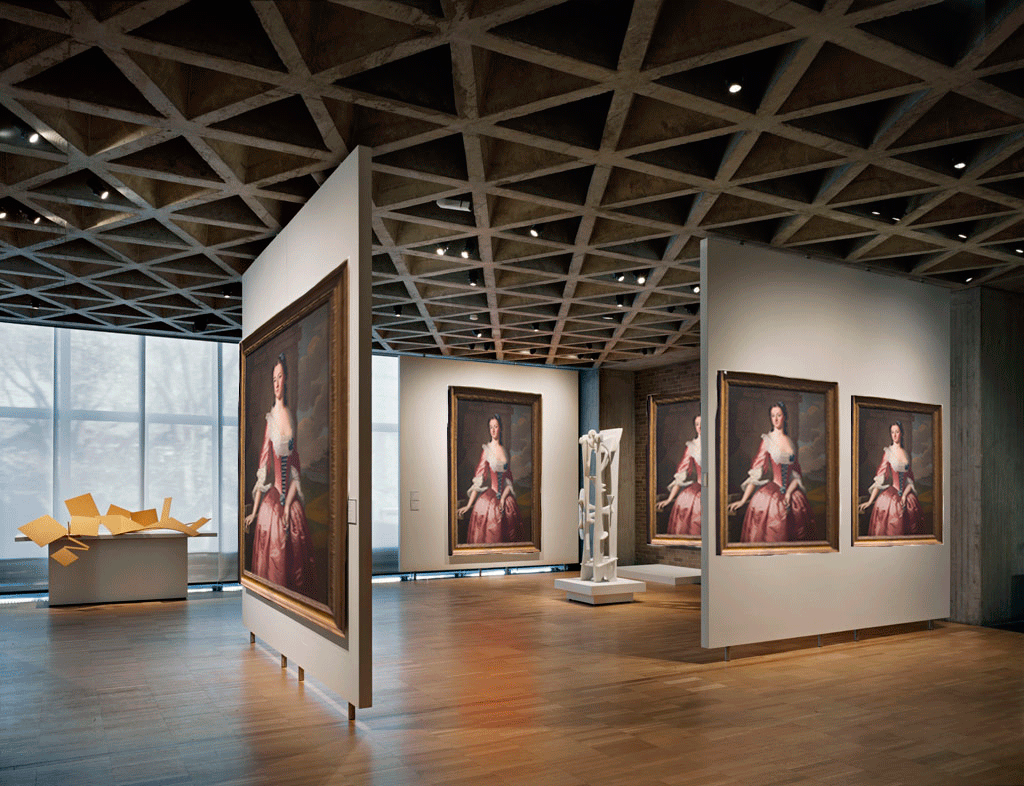
This project differed from those I completed previously in that the primary goal of this project was not to restore a damaged image. The goal of this assignment was to place the original painting-- pictured above in the left column-- into each pane in the image of the gallery --pictured above in the right column. I completed the final project--pictured below the originals-- by using the distort feature on Adobe Photoshop version 6 and resizing and cropping the images so that they would fit on each individual pane.
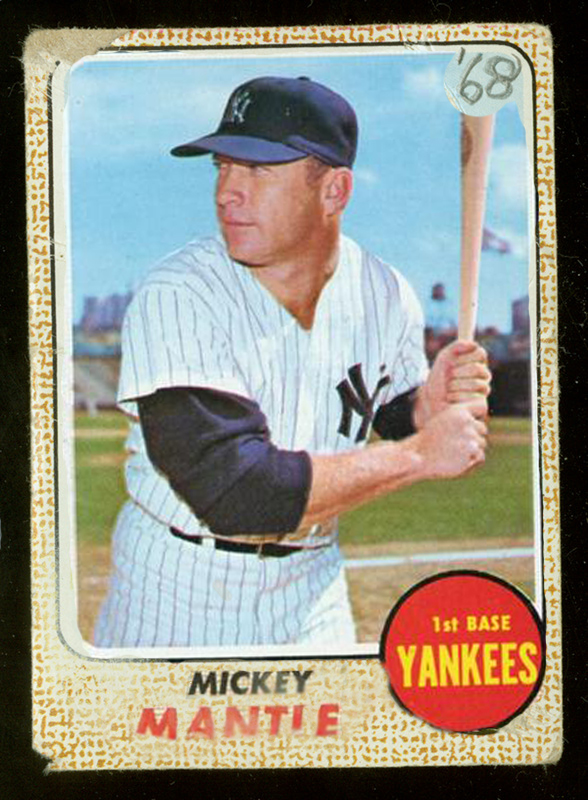
Restoration-- Worksheet #5
Before:
After:
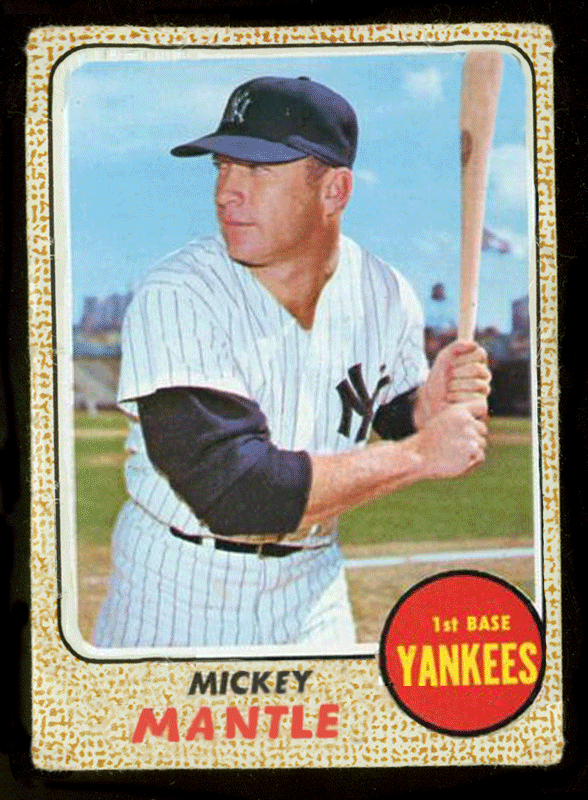
This project is the fourth restoration and the fifth overall in-class project I completed as part of the Digital Photography Course. The goal was to edit the image of a baseball card to bring it back to original condition. The baseball card was discovered by the course instructor, probably damaged by its previous owner. In mint condition the card would have significant value. I completed this project using clone stamp, the paint tool to restore the lettering, and the copy and paste feature in Adobe Photoshop CS 6.
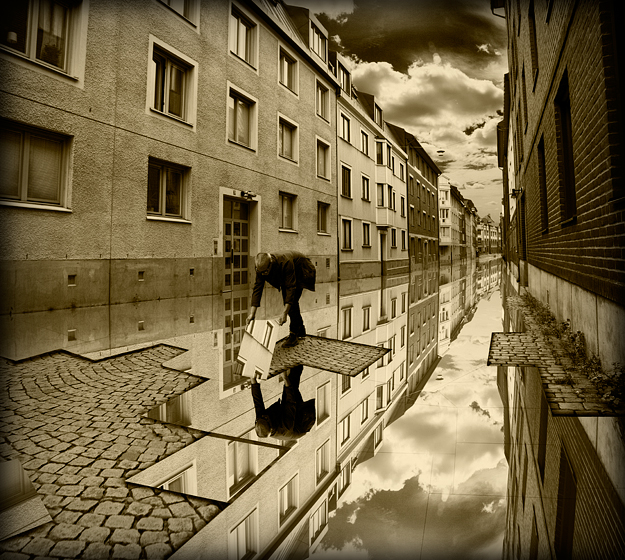
Alteration-- Worksheet #6
|
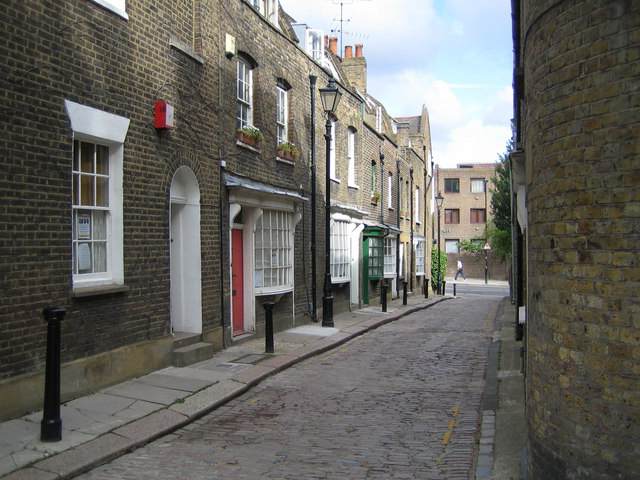
|
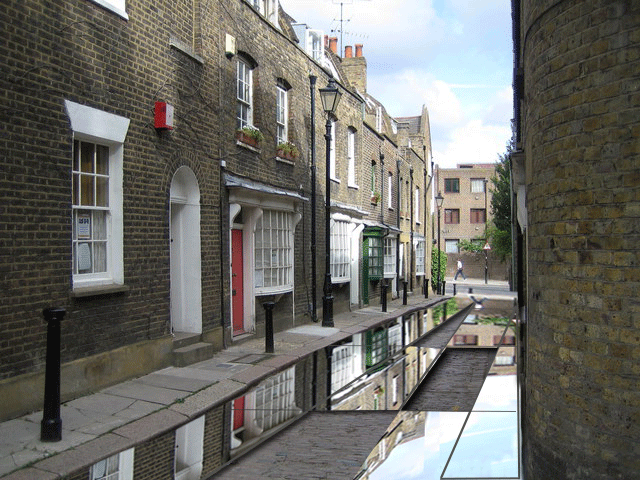
In this project we were tasked with the goal of transforming the picture in the right column into something similar to that of the left, mimicking the work of Eric Johansson, a Sweedish artist who uses photoshop to create reflective pieces of art. The main goal was to create what appeared to be a mirror on the street pictured in the original image, which I achieved by using inverting and skewing the copied portion of the image. After that I used the vanishing point to create the illusion of panes in the "glass" and cut out a few panes and added a drop shadow to further the illusion. I did all of this using Adobe Photoshop CS 6
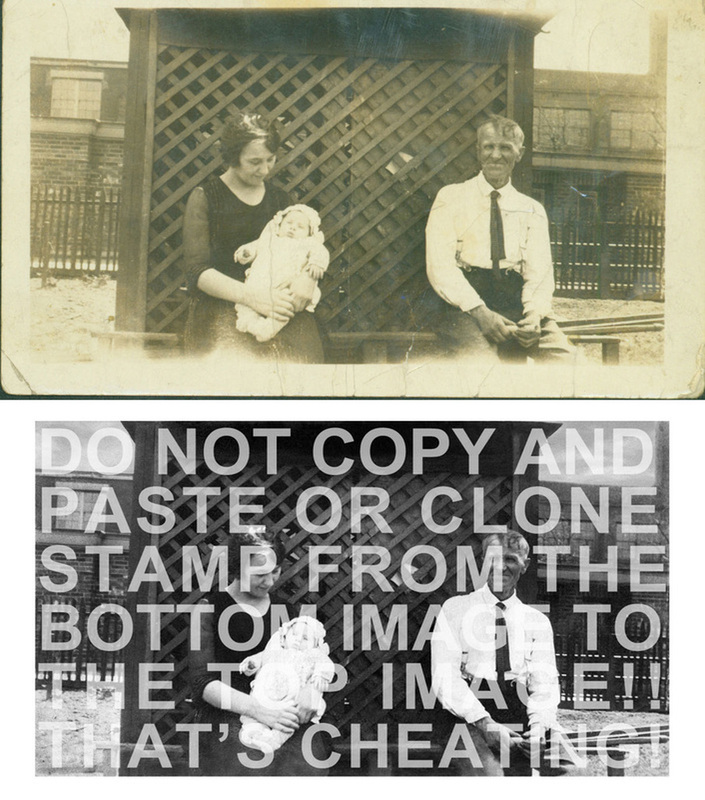
Restoration-- Worksheet #7
|
Before:
|
After:
|
The purpose of this project was to, as best as possible, get the left side of the image to match the right, which had been heavily retouched. We were instructed not to copy and paste or use the clone stamp tool to match the images. To that end I used the paint tool, the blur tool, and burn and dodge to match the images as best as possible. All of this was achieved using Adobe Photoshop CS 6.
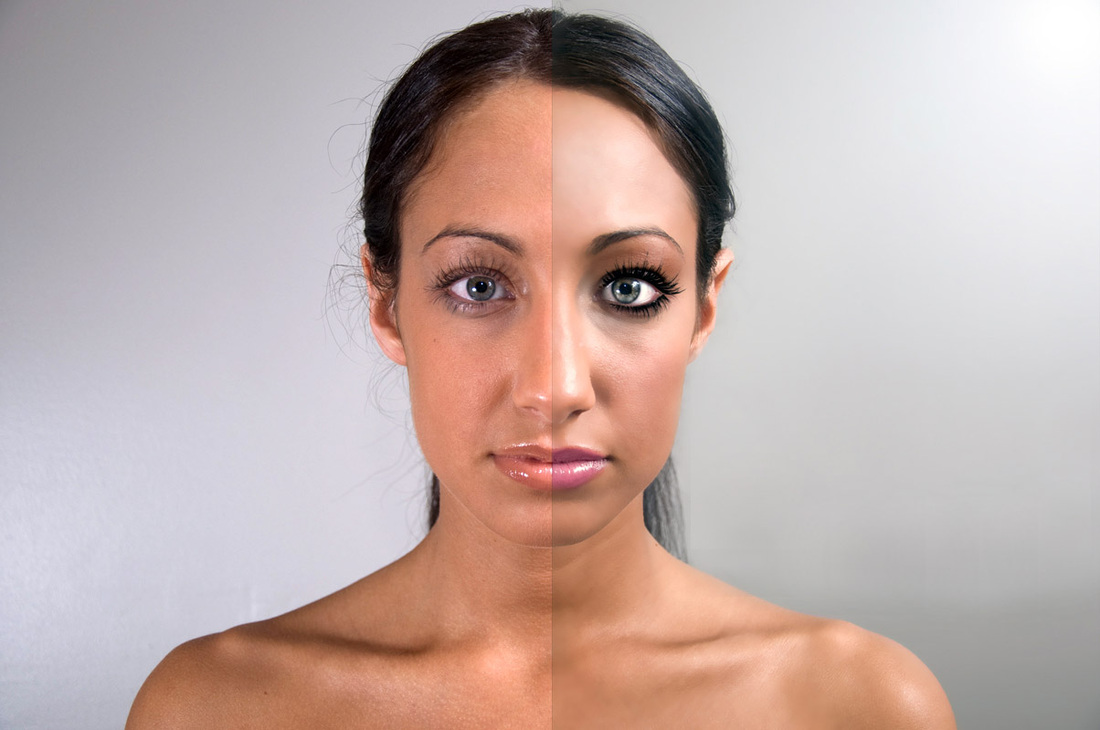
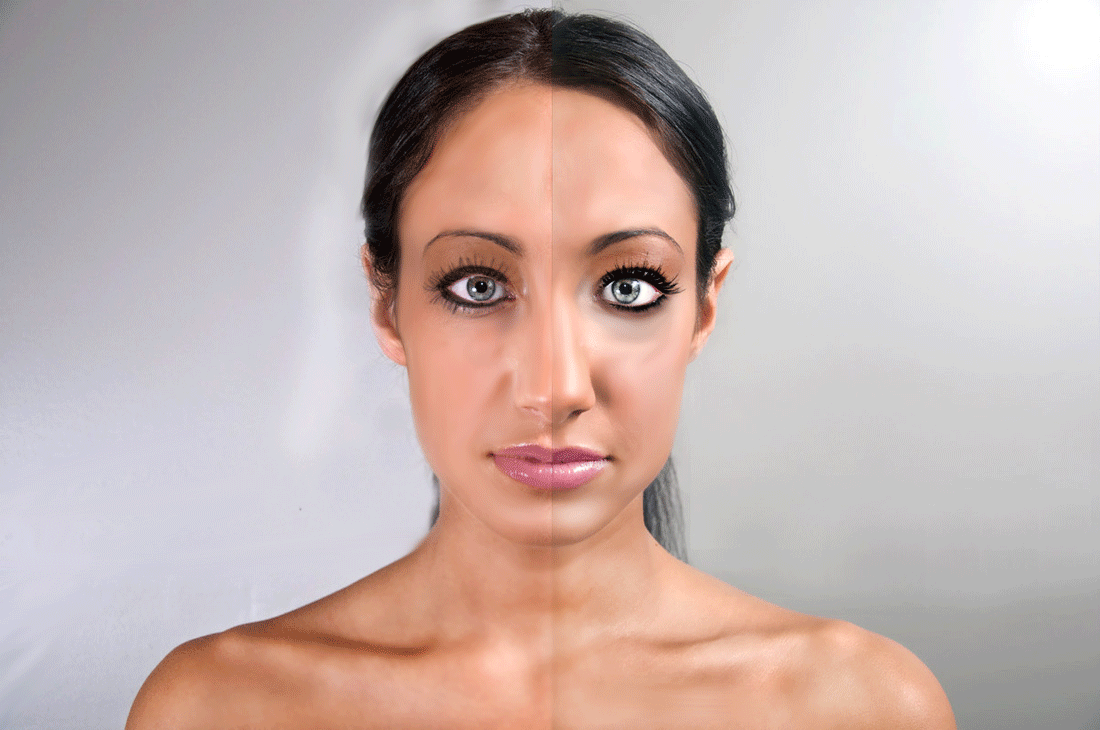
Restoration-- Worksheet #8
|
Before:
|
After:
|
This was the final photograph restoration I completed for Digital Photography. It was a difficult project, mainly because of the intense differences in sharpness between the above image and the below, but once I restored the color and used the sharpen tool it progressed fairly easily.
